Affiliate disclosure: This post contains affiliate links. If you buy through them, I may earn a commission at no cost to you. I only recommend equipment and ingredients I have actually used in professional kitchens.
Every food blog has a “best chocolate chip cookie recipe.” I am not going to pretend that mine is magic — the ingredient list is nearly identical to everyone else’s. What I can give you is something most recipe writers can’t: the method we use in restaurants, where cookies have to come out of the oven identical, sixty at a time, all service long.
Three things separate a restaurant cookie from a home cookie: brown butter, a night in the fridge, and chocolate good enough to be the point of the cookie. The first two are technique. The third is the real problem — because the chocolate is where supermarket shopping fails you, and I’ll spend real time on how to fix that.
The Three Restaurant Rules
- Brown the butter. Nutty brown butter is what makes people ask what’s different about your cookies. It’s four extra minutes and one extra bowl. (It’s also the same trick behind my madeleines — one technique, two recipes.)
- Rest the dough overnight. Twelve to twenty-four hours in the fridge. The flour hydrates fully, the sugar dissolves, and the dough bakes into a cookie with crisp edges and a molasses-deep toffee flavor you cannot get any other way. This isn’t a home-baker superstition — Jacques Torres, one of the best pastry chefs of our generation, is the one who put this exact technique on the map, and every serious kitchen that rests its cookie dough is following his lead. No shortcut version of this dough is worth baking.
- Weigh everything, including the dough balls. Restaurants portion with a scoop so every cookie is the same size and therefore bakes the same. At home, a scale and 85-gram balls — about 15 cookies from this batch. Same size = same bake, every time.
Now the recipe, then the chocolate — the part that actually matters most.
Ingredients
Makes about 15 large cookies. Weigh. Cups are why your last batch was different from mine.
- 230 g (2 sticks / 16 tbsp) unsalted butter
- 200 g (1 cup, scant) dark brown sugar, packed
- 100 g (½ cup) granulated sugar
- 2 large eggs, cold from the fridge
- 2 tsp vanilla extract (real — see below)
- 300 g (2½ cups) all-purpose flour
- 1 tsp baking soda
- 1 tsp fine sea salt, plus flaky salt to finish
- 300 g (10½ oz) chocolate — chunks chopped from a bar, not chips (the whole next section)
Method
- Brown the butter. Melt the butter in a light-colored saucepan over medium heat. Foam, then keep going, swirling, until the milk solids turn golden brown and it smells like hazelnuts — 4 to 6 minutes. Pour it into a bowl, scraping in every browned bit, and let it cool until it’s warm, not hot — 10 minutes or so. You’ll lose a little water to evaporation; that’s expected, it’s why the cookie gets dense and toffee-like.
- Make the dough. Stir both sugars into the warm brown butter (no mixer needed — melted-butter doughs don’t cream, they stir). Add the eggs and vanilla and beat hard with a spatula or whisk for a full minute, until the batter is glossy and slightly thickened — this dissolves the sugar and emulsifies the eggs, and it matters. Sift the flour, baking soda, and salt over the bowl and fold until just combined. Fold in the chocolate.
- Rest — overnight, ideally 24 hours. Press plastic wrap onto the surface of the dough and refrigerate 12 to 24 hours. (It will keep, covered, up to 72 hours; the flavor keeps deepening, though the returns diminish.) If you truly cannot wait, see my notes on the madeleine page about thermal-shock baking — but understand you are trading away the best version of this cookie.
- Portion cold. Scoop or scale the cold dough into 85 g balls (about 5–6 level tablespoons, or a #12 portion scoop). You’ll get roughly 15 balls from this batch. If the dough is too firm to scoop cleanly, let it warm 15 minutes — no more. You can freeze the balls at this stage, bagged, and bake from frozen (+2 minutes).
- Bake. Preheat to 375°F (190°C) with a rack in the center. Arrange 6 balls on a lined sheet, well spaced, and press a few extra chocolate chunks into the top of each — the restaurant trick that guarantees visible chocolate in every finished cookie. Bake 11 to 13 minutes, until the edges are deep golden brown and the centers still look slightly underdone and glossy. Rotate the sheet at 7 minutes. Pull them at “is that done?” — carryover heat finishes the center on the pan.
- Finish on the pan, not a rack. Let the cookies sit on the hot sheet 5 full minutes — they set up as they cool and lift off cleanly. Sprinkle with flaky salt while warm. Then eat one, standing up, at minute six. That is the cook’s privilege and the entire reason to bake cookies at home.
The Chocolate Problem
Now the honest part. The recipe above is standard. The chocolate is where your cookies become either the best thing anyone at your table has eaten this month or just another cookie — and the supermarket is where good baking chocolate goes to hide.
Here is what forty years of ordering chocolate for kitchens has taught me:
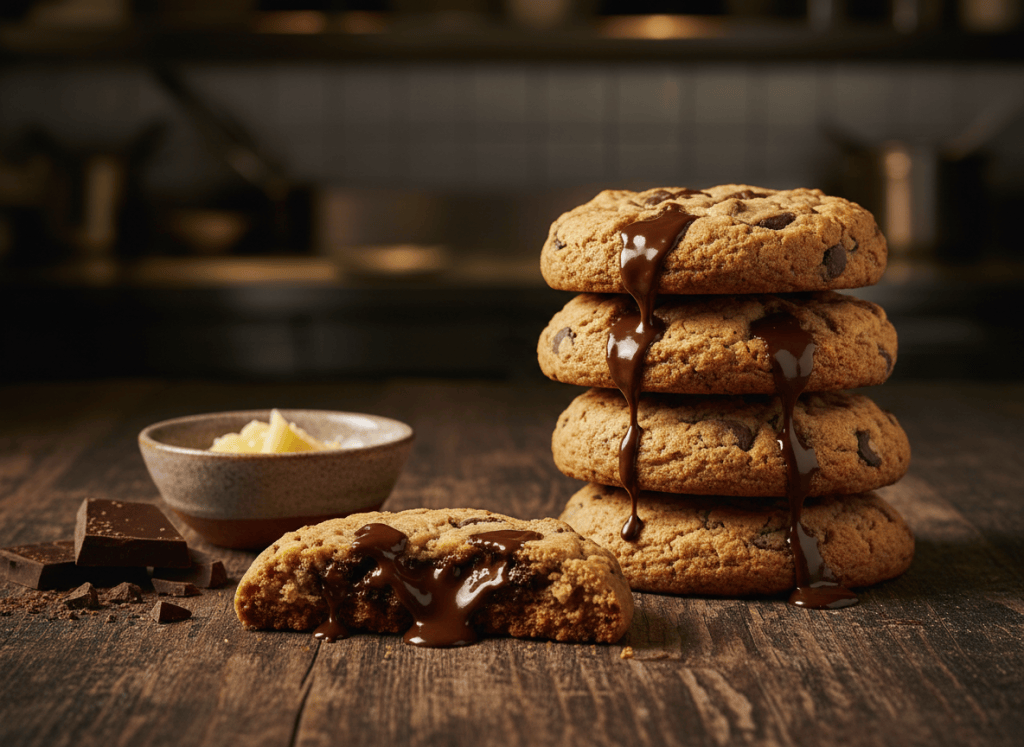
Chocolate chips are engineered not to melt. They’re formulated with less cocoa butter to hold their shape in the oven. That’s why a chip cookie has little hard nubs of chocolate instead of molten pools. If you do nothing else from this section: stop using chips. Buy bars, chop them. Chopped chocolate gives you shards and dust — thin pieces that layer into the dough and pools that stay molten. The cookie changes completely.
Percentage matters more than brand at the supermarket. For this cookie you want 60–70% cacao dark chocolate. Below 55% and it’s too sweet and barely tastes of chocolate; above 75% and it turns brittle and bitter against a sweet dough.
“Baking chocolate” is often the worst chocolate in the aisle. The name-brand baking bars are frequently made from the leftover, lower-grade beans — the good beans go to the eating bars. This is the single most useful thing I know about supermarket chocolate: sometimes the best baking chocolate in the store is the good eating chocolate in the next aisle over. Look at the ingredient list: cocoa mass (or cocoa liquor), cocoa butter, sugar, maybe lecithin and vanilla. That’s it. If the first ingredient is sugar, or you see “chocolate flavor” or vegetable fat substitutes, walk away.
Vanilla, quickly, since we’re honest: real extract, not “vanillin.” The fake stuff is instantly recognizable in a cookie with this few ingredients.
What I Actually Use
In order of availability:
- A couverture bar from a real chocolate maker — Guittard, Valrhona, Callebaut, or any single-origin bar from a craft maker. Guittard is the California workhorse and my default for cost; Valrhona 64% is the special-occasion version. Buy the big bars (they’re cheaper per pound than grocery checkout bars, always).
- A good eating bar that passes the ingredient test above. Ghirardelli and many supermarket “intense dark” bars qualify. Chopped fine-ish. I have baked service cookies from grocery bars many times; the ingredient list, not the price, is the test.
- Chocolate chips, only as a last resort — and then only a brand whose first ingredient is chocolate, not sugar.
You will hear people say the brand doesn’t matter. Those people have not done a side-by-side. The chocolate is a third of this cookie by weight — a third of your cookie is only as good as your sourcing. This is the restaurant reality: we spend disproportionate time and money on the ingredients that are the point of the dish, and in this cookie, the chocolate is the point.
Common Problems
Cookies spread too thin? Butter too warm when the dough was mixed, dough not rested, or the sheet went in before the oven fully preheated. Also: weigh your flour.
Puffy and cakey? Too much flour (cups again) or the brown butter was under-measured after evaporation — weigh after browning.
Dry and hard the next day? Underbaked centers were needed; you overbaked instead. Pull at glossy-center stage and trust the 5 minutes on the pan.
Every cookie a different color? You didn’t portion by weight or rotate the sheet. Same size, one rotation — that’s the whole restaurant system.
Dough balls frozen solid? Bake from frozen, add 2 minutes, expect slightly thicker cookies.
What to Serve Them With (and a Word on Timing)
Like a madeleine, a chocolate chip cookie has a peak: the first hour after baking, when the edges are crisp and the centers still molten. This is why restaurant cookies are baked to order in twos and threes and why the dough lives in the fridge, portioned. Portion your whole batch, keep the balls chilled, and bake six at a time all week. The dough improves for three days. You are now running a cookie program, not baking a batch.
Milk, obviously. Or — the pairing I’d serve at a dinner party — a glass of Banyuls or tawny port with the last cookies of the evening.
FAQ
Can I skip the overnight rest?
You can bake the dough immediately — they’ll be good, not memorable. The rest is where the toffee depth comes from, and it’s the step Jacques Torres built his reputation on getting right. If you must bake same-day, give the dough even one hour in the freezer.
Can I use all brown sugar?
Yes — deeper, moister, chewier, less crisp. 300 g brown and skip the white. My favorite variation, honestly.
Why weigh the dough balls?
Same-size cookies bake identically. It’s the difference between pulling one perfect tray and pulling a tray where half are overdone. An 85 g ball is about 5–6 tablespoons — a #12 portion scoop makes this effortless.
Butter: browned vs regular?
Browning drives off water and adds nutty Maillard flavors. The dough becomes denser and chewier with crispier edges. It’s the single biggest flavor upgrade in this recipe.
Can I make them smaller?
Scale to 60 g balls, bake 9–10 minutes. Everything else identical.
Equipment I Used
- Digital kitchen scale — non-negotiable for this recipe; cups are why your batch won’t match mine.
- A light-colored stainless saucepan — lets you actually see the butter turn from foam to golden-brown, which is the whole trick.
- Half sheet pans — heavy aluminum, no warping, even browning. Line with parchment.
- Maldon flaky sea salt — for finishing, not the dough itself.
Related Reading
- Classic French Madeleines — the brown-butter technique that started it all, and the eat-them-fresh philosophy
- Copper vs. Silicone vs. Black Steel Molds — more from the equipment-material-debate series
- Wood vs Plastic Cutting Boards — another precision-and-weighing crossover
 The Seasoned Bench
Leave a comment